Hi everyone,
In this tutorial, I’ll show you how to use Katalon TestOps Agent to schedule and remotely execute a Katalon Studio project.
Katalon TestOps Agent will help you:
- Install and manage multiple versions of Katalon Runtime Engine on your test machines without any manual intervention.
- Retrieve the latest version of your Katalon Studio projects that are stored on Katalon TestOps or Git to execute, and submit the test results back to Katalon TestOps for review.
- Keep the number of concurrent executions under a configurable limit. Katalon TestOps will distribute jobs among Agents to balance their workload. This feature is especially helpful if you only have a limited number of licenses and want to queue your executions periodically.
Prepare a sample Katalon Studio project
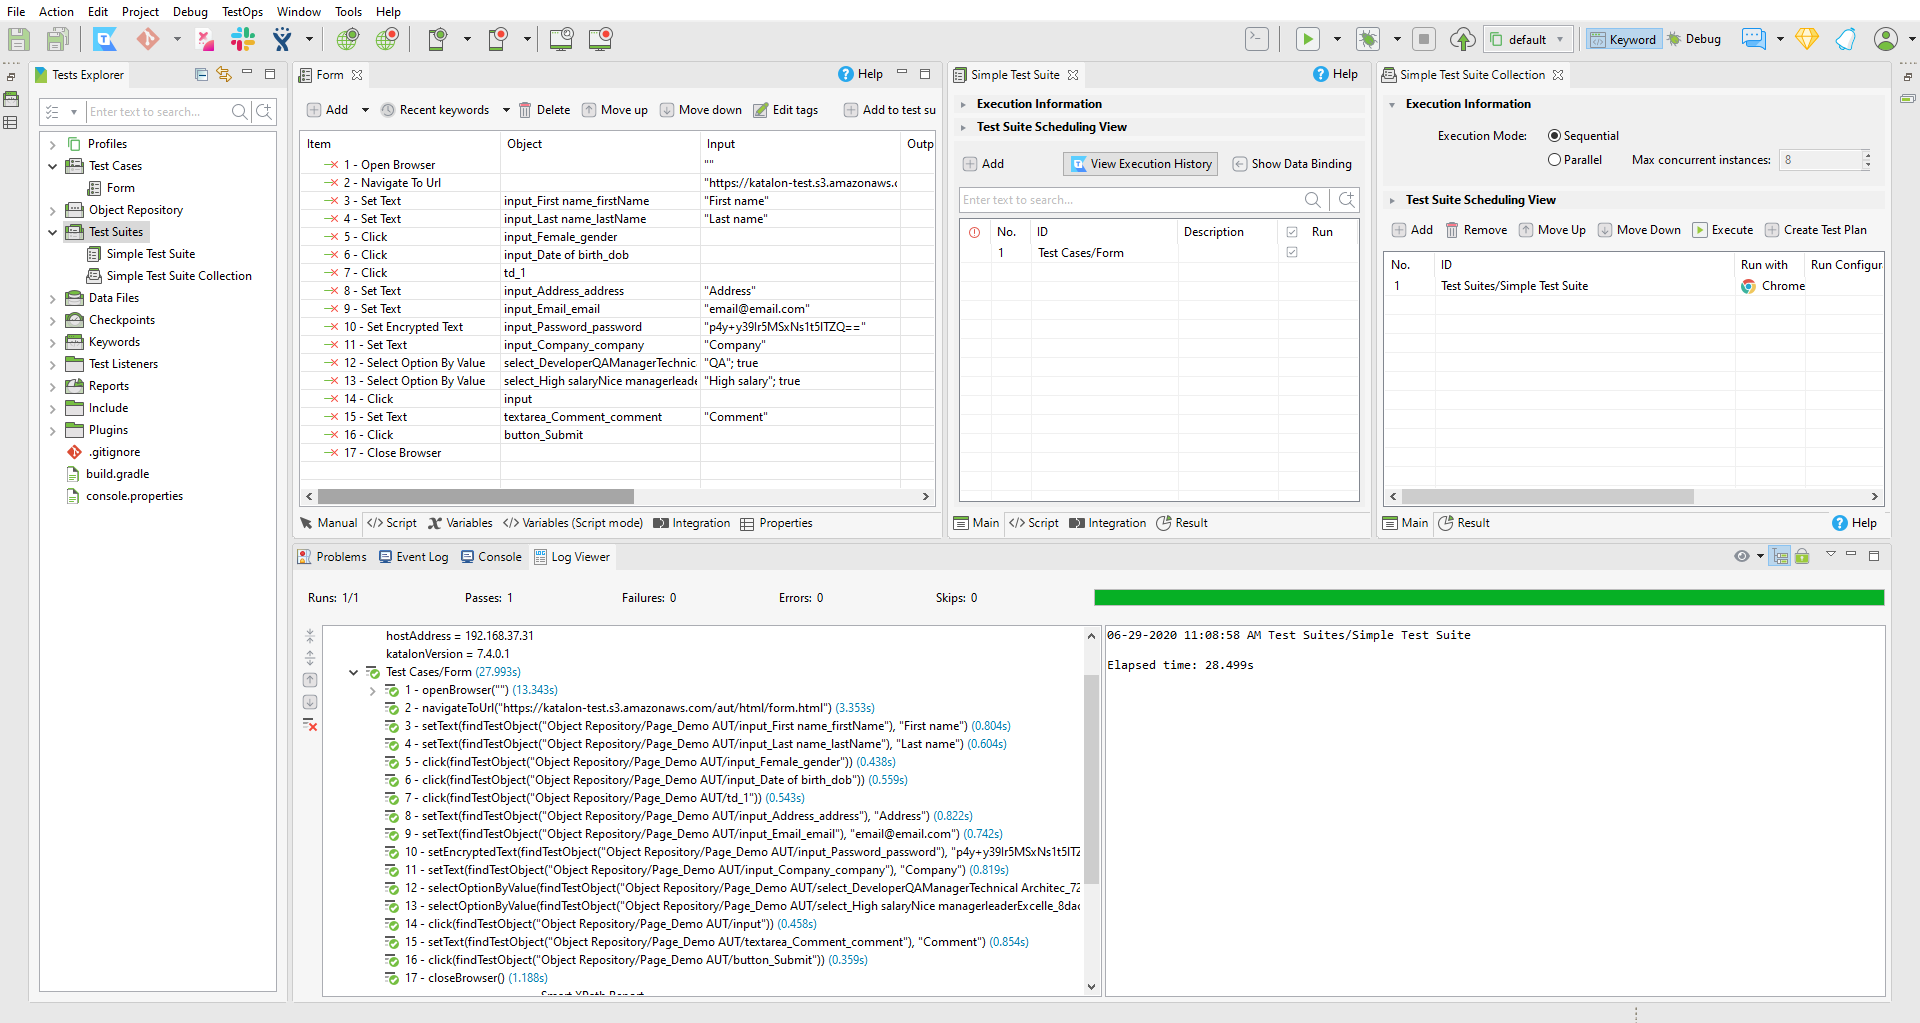
You can find the sample project here GitHub - katalon-studio-samples/test-project-sample. This project contains a single test case (Form) that fills information into a form. The test case is put in a Test Suite (Simple Test Suite) and this test suite is put in a Test Suite Collection (Simple Test Suite Collection).
Integrate with Katalon TestOps
Connect this sample project to a Katalon TestOps project.

This way execution results will be submitted back to Katalon TestOps. It also helps monitor the progress of long-running executions.

Install Katalon TestOps Agent on a test machine
Navigate to Katalon TestOps CI.

From here, navigate to the Agent Setup wizard.
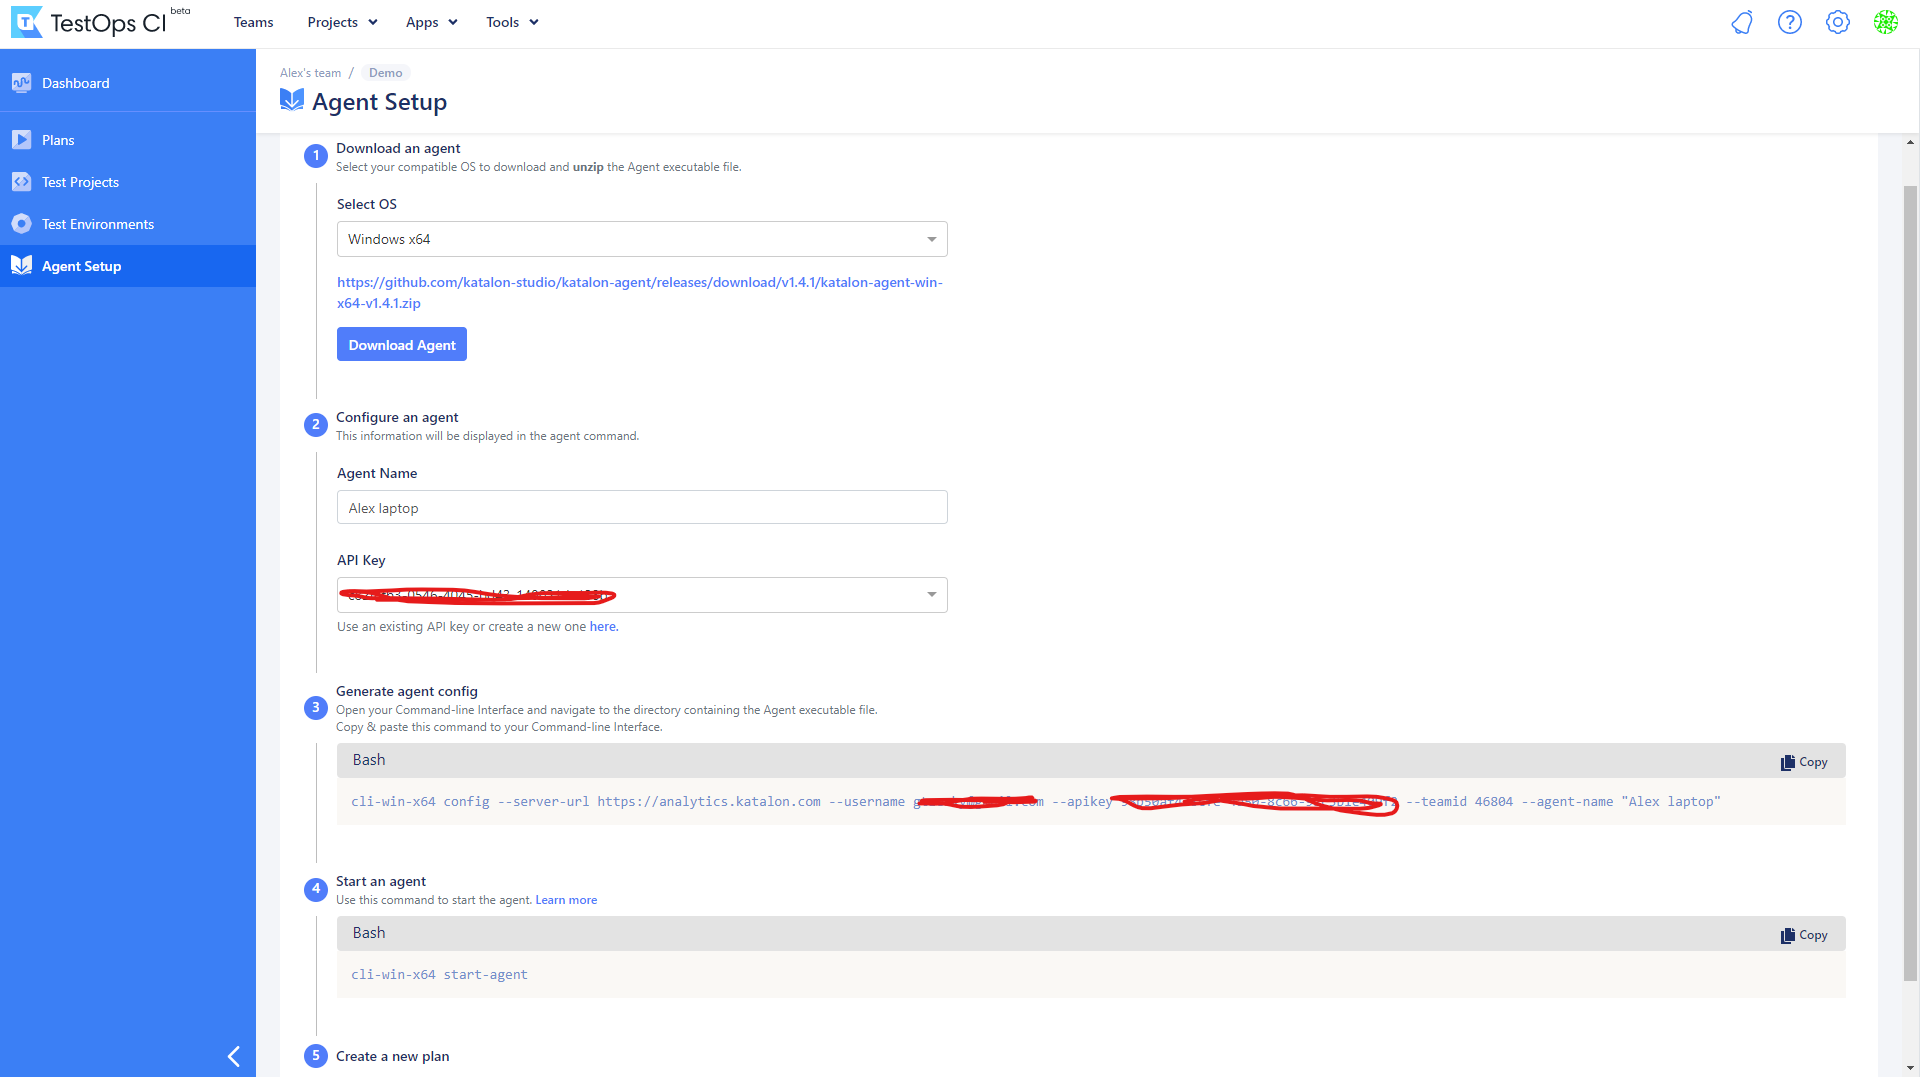
In this wizard, provide my machine’s OS (Windows x64) and download the package from the link (https://github.com/katalon-studio/katalon-agent/releases/download/v1.4.1/katalon-agent-win-x64-v1.4.1.zip). In this tutorial, I will use Alex laptop as my Agent’s name, and select an API key.
Next, unzip the Agent package and open the folder in the CMD window. Copy the two commands shown on the wizard and run them one by one.

After about a minute, the new Test Environment should be added.

Submit the Katalon Studio project to Katalon TestOps CI
Click on the “Cloud” button, set the Test Project name, and click Upload.

You can navigate to Test Projects in Katalon TestOps CI to see the newly uploaded Test Project.

Create a Test Plan on Katalon TestOps CI
Navigate to Test Plan in Katalon TestOps CI and click on the Create Plan button.

Next, fill out the information in the wizard. After that, click on the Create button. It’s possible to select multiple Test Environments - the workload will be distributed evenly between them.

To verify my configuration, click on the Run button.


Navigate to the detail page of the newly created Job, and it shows that the Agent is running the Job. You can monitor the Job via the logs that are pushed on-the-fly by the Agent.

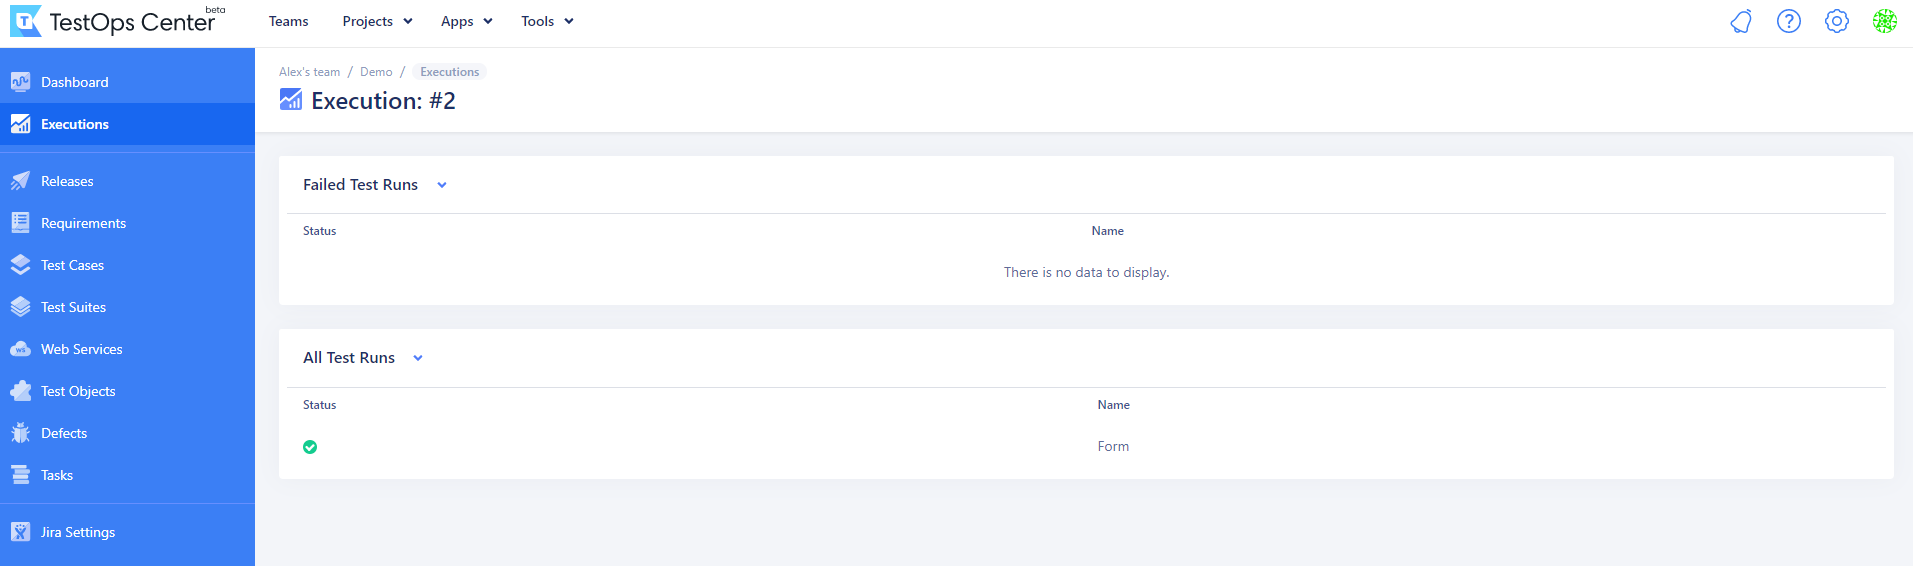
The running execution can also be monitored in Katalon TestOps Center.
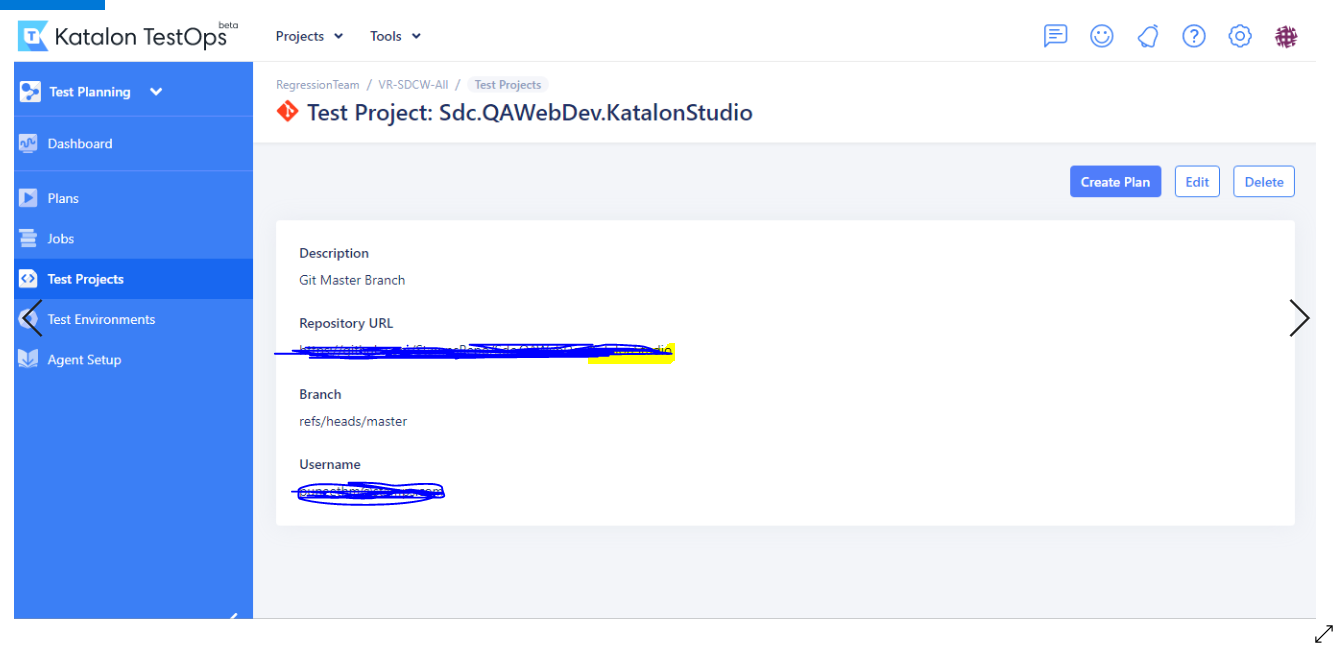
Use Git repository as a Test Project
Alternatively, Github repository can be used as a Test Project. Since this is a public Github repository, I will left Username and Password empty. For private repositories, an account with username and password (or personal access token in case they are hosted on Github) is required.

The wizard to create a Plan will change a bit. Note that -apiKey and -projectPath are unnecessary since they will be appended by the Agent.

Limit Agent’s capacity based on the number of Katalon Runtime Engine licenses
Katalon TestOps provide a way to impose a limit on how many jobs an Agent can run at the same time. Exceeding jobs will not be canceled - they are put into a queue and will be executed when slots are available.
This is a very handy feature. Say, you have two Katalon Runtime Engine licenses. In this case, there is no point running three executions at the same time, since Katalon Runtime Engine will cancel the third session.

Next step
You can keep the Agent always running by installing it as a service.
Thank you for all the feedback and suggestions for the features.
Happy testing!